Thunderbird: Difference between revisions
Jump to navigation
Jump to search
No edit summary |
No edit summary |
||
| Line 7: | Line 7: | ||
| [[Media:ConfigureThunderbirdEmail.mp4|Email]] | | [[Media:ConfigureThunderbirdEmail.mp4|Email]] | ||
|| | || | ||
|} | |||
==How to setup your email on Thunderbird== | |||
{| style="width:100%" border="0" cellspacing="0" cellpadding="20" style="font-size:120%; | |||
|- | |||
|style="width: 50%"| | |||
*<b>Required: Before continuing this section please complete [[How to import Certificate Authority in Windows 10#How to install Computerisms Certificate Authority into your Thunderbird mail client|How to install Computerisms Certificate Authority into your Thunderbird mail client]]</b> | |||
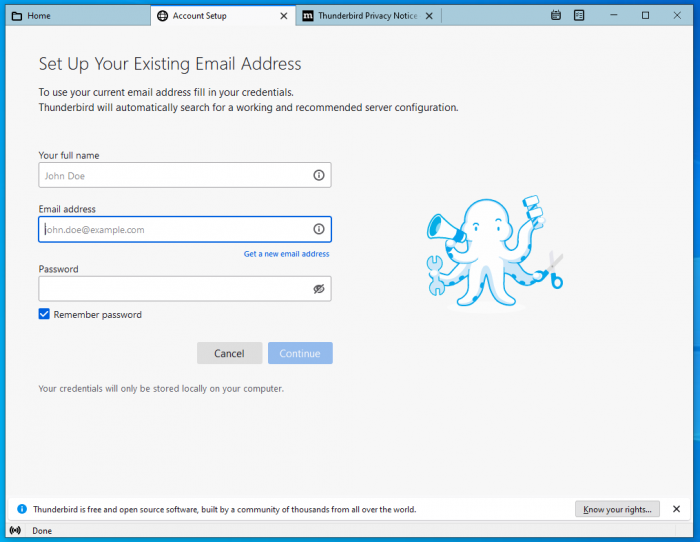
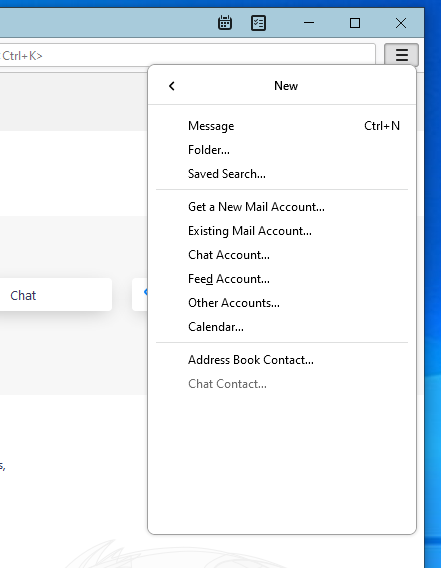
*Navigate to add a new account | |||
*If you don't have any account setup on Thunderbird you can choose "Skip This and use my existing email" on the Thunderbird pop up welcome page to add a new account | |||
|[[File:Tbemail1.png|centre|700px]] | |||
|- | |||
|[[File:Tbemail2.png|centre|700px]] | |||
| | |||
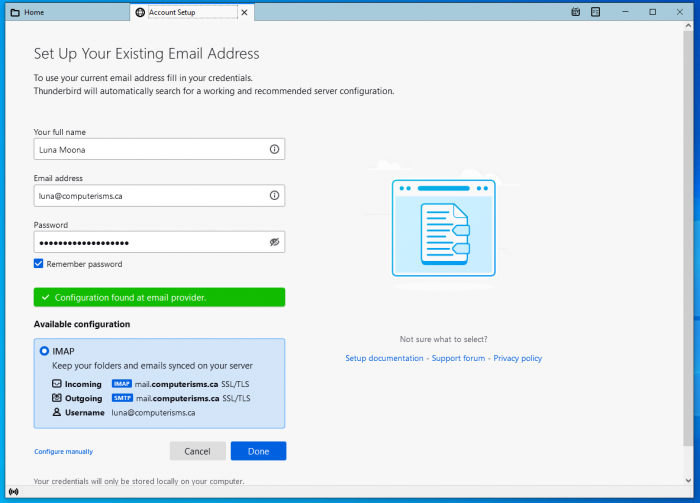
*Enter your Name, Email and Password and click on Continue | |||
|- | |||
| | |||
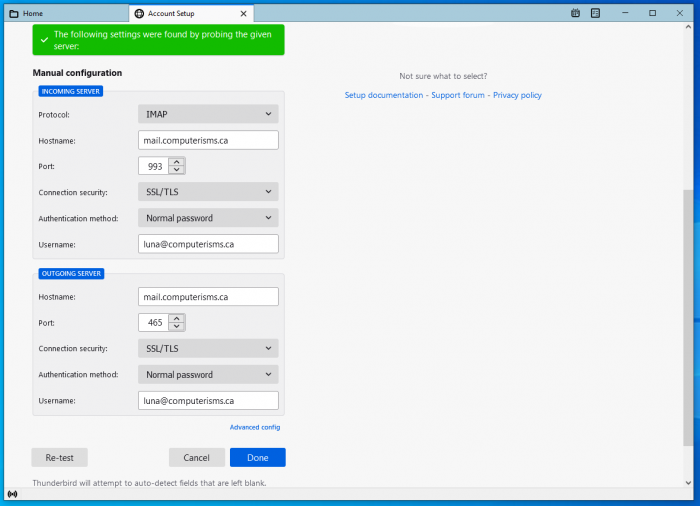
*Make sure the server host name for both Incoming and Outgoing is mail.domain.tld | |||
*For IMAP configure using SSL (port 993) | |||
*For POP3 configure using SSL (port 995) | |||
*For SMTP configure Port 587 With Authentication using incoming user/pass and STARTTLS | |||
*Click on Done | |||
*Your email is now setup send a email to yourself to TEST functionality. | |||
|[[File:Tbemail3.png|centre|700px]] | |||
|- | |||
|} | |} | ||
Revision as of 22:41, 5 November 2020
Video Instructions

|
|
How to setup your email on Thunderbird
|
 |
 |
|
|
 |
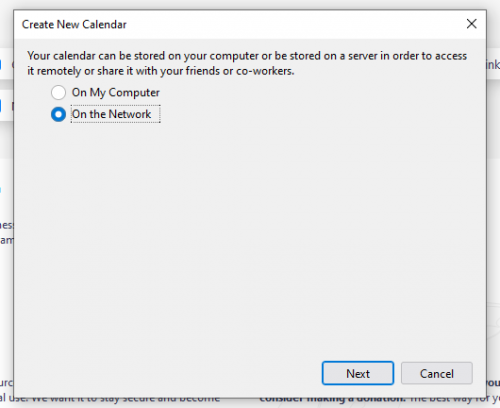
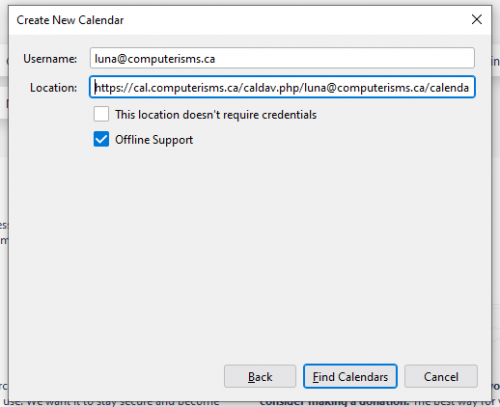
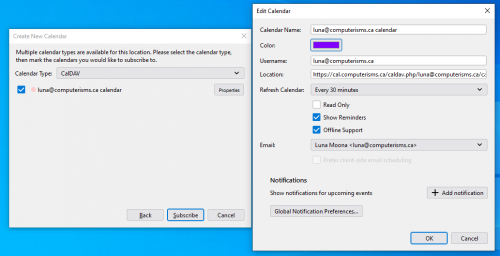
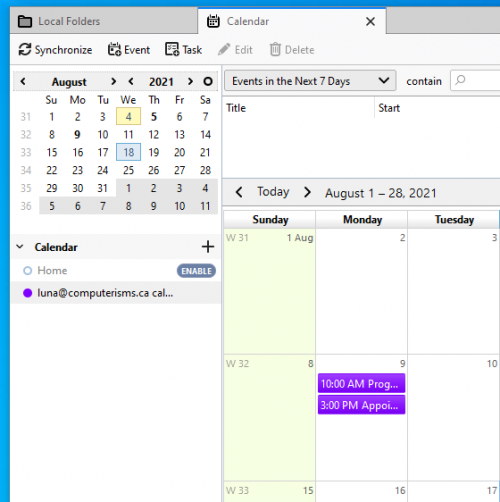
Calendar
Before you begin:
- You will need to have the lightning plugin installed in thunderbird
- You will need the DAV Path found on the server or the DAV Path from some else's Calendar
|
 |
 |
|
|
 |
 |
|
|
 |
 |
|
|
 |
 |
|
Before you begin:
- You will need to have the lightning plugin installed in thunderbird
- To install this plugin you need to go this page: http://www.sogo.nu/downloads/frontends.html
- Download the one called SOGo Connector Thunderbird extension, save it some place easy like your desktop or downloads folder
- In Thunderbird, open settings=>Add-ons
- Under the Add-ons Manager tab near the top will be another settings button, under that will be an option to install and add-on from file
- Browse to where you saved the file and double click, then click the "Install Now" button, then click the restart link
- You will need the DAV Path found on the server or the DAV Path from some else's Calendar
- Note those instructions show you how to retrieve the path for your calendar collection, you need to get the path for your address book collection instead
When you are ready:
- Navigate back to the Inbox tab and click your Address Book button
- click file=>New=>Remote Address Book
- In the window that opens, enter a name
- The Name is an arbitrary value you can use to identify this address book, it can be anything meaningful to you.
- In the URL field enter the DAV Path you obtained earlier
- Your DAV Path contains an @ symbol. You must remove that symbol and put %40 in its place
- By example, your DAV Path will now look like this: https://cal.computerisms.ca/caldav.php/bob%40computerisms.ca/addresses/
- Select your Notification and Syncronize options then click Okay