QmailAdmin Management: Difference between revisions
Jump to navigation
Jump to search
No edit summary |
|||
| Line 29: | Line 29: | ||
|- | |- | ||
|style="width: 50%"| | |style="width: 50%"| | ||
|- | |||
|[[File:Managemodifiuser.png|centre|500px]] | |||
| | |||
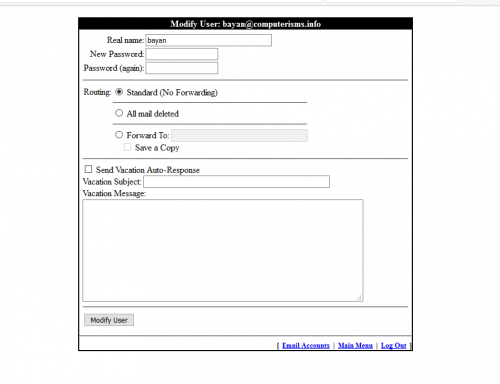
*[[Media:QmailAdmin.GeneralUser.mp4|Watch the Video]] | *[[Media:QmailAdmin.GeneralUser.mp4|Watch the Video]] | ||
*In this window you can: | *In this window you can: | ||
| Line 39: | Line 42: | ||
**Set up '''Vacation Auto-Response''' | **Set up '''Vacation Auto-Response''' | ||
*When you finish editing account press '''Modify User''' | *When you finish editing account press '''Modify User''' | ||
|} | |} | ||
Revision as of 18:14, 16 August 2016
Video Instructions

|

|

|
| Passwords, Forwards and Auto Responses |
Mailing List Management |
Domain/Account Administration |
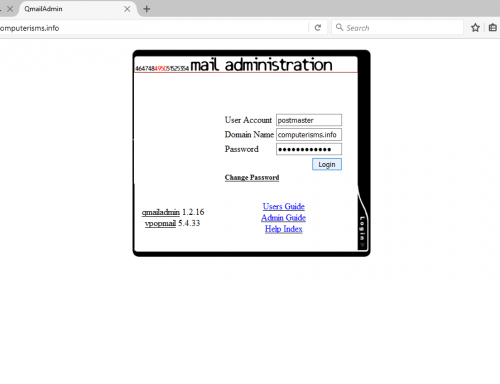
Regular Account
|
 |
Modify User
 |
|
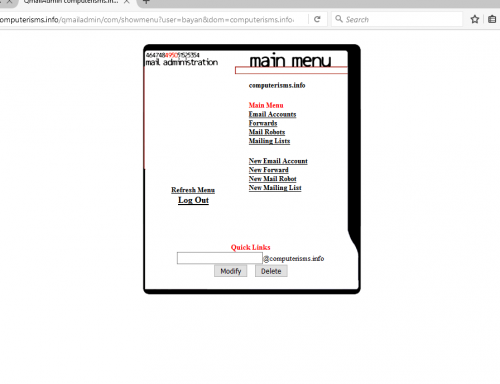
Admin Account
|
 |
 |
|
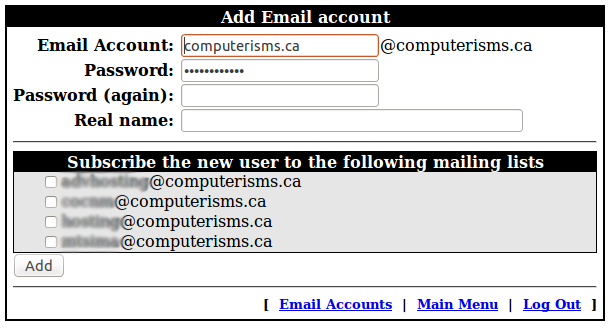
New Email Account
- Watch the Video
- On the main menu go to New Email Account
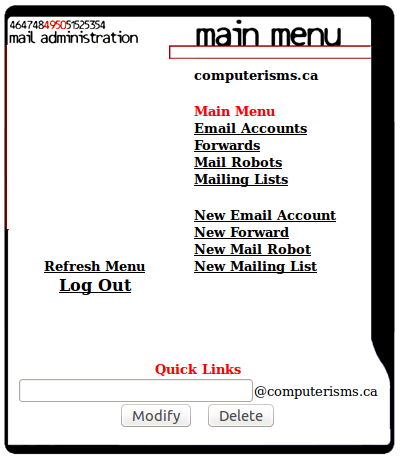
- Enter new Email Account
- Enter Password
- Enter Password (again)
- Enter Real Name, if you want
- Click Add button
New Forward
- Watch the Video
- On the main menu go to New Forward

- Enter Name
- Enter Destination
- Click Add button

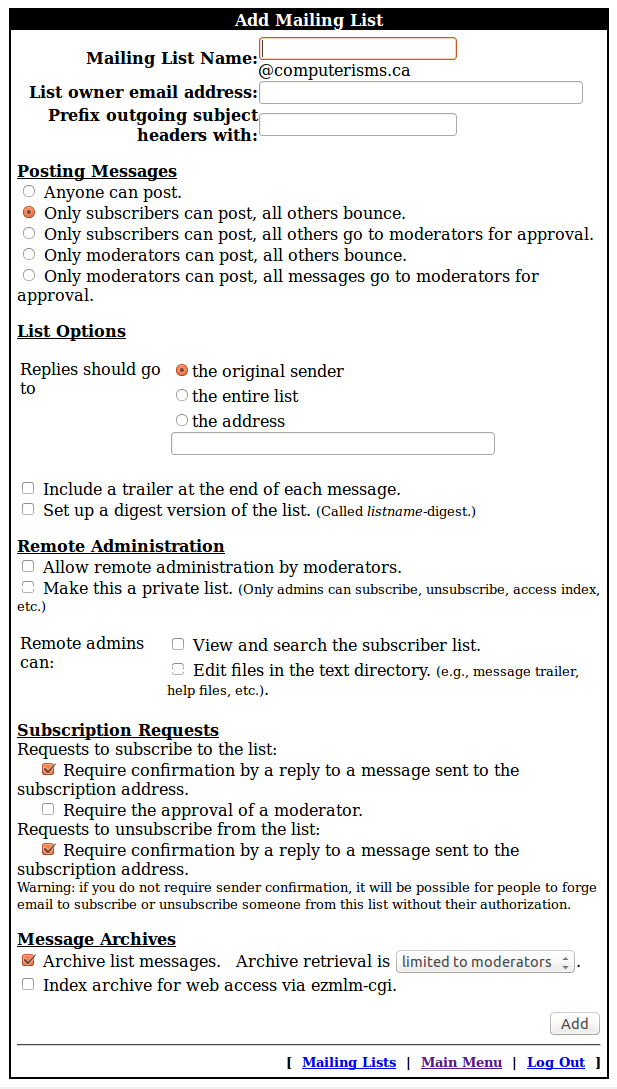
New Mailing List
- Watch the Video
- On the main menu go to New Mailing List

- Enter
- Mailing List Name
- List owner email address
- Prefix outgoing subject headers with
- Choose Posting Messages:
- Anyone can post.
- Only subscribers can post, all others bounce.
- Only subscribers can post, all others go to moderators for approval.
- Only moderators can post, all others bounce.
- Only moderators can post, all messages go to moderators for approval.
- Choose in List Options Replies should go to
- the original sender
- the entire list
- the address
- Also you can check marks in sections
- Remote Administration
- Subscription Requests
- Message Archives
- When you done click Add button
- Click Add button
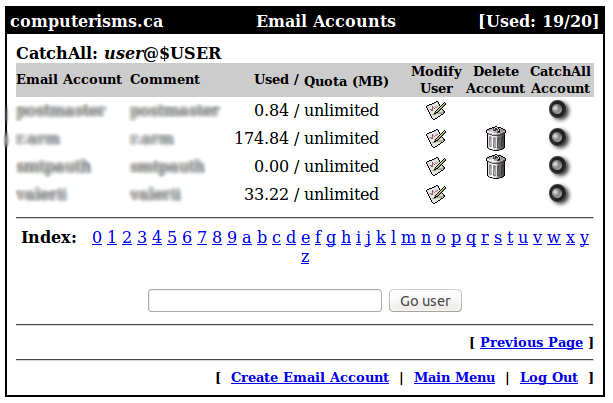
Manage Email Accounts
- Watch the Video
- On the main menu go to Email Accounts

- In the Email Accounts window you can
- Modify User
- Delete Account
- Catch All Account - this allows to get all emails with different spelling, but it will get lots of spam as well. So it is not recommended to set up this feature.
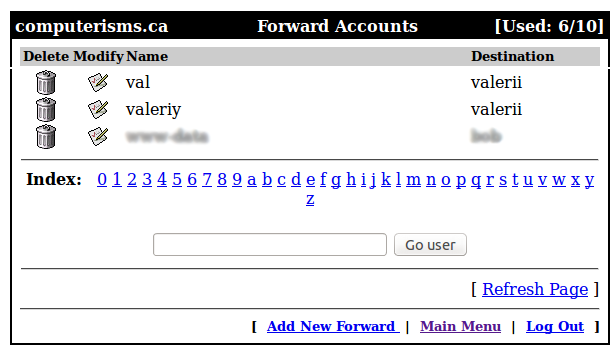
Manage Forwards
- Watch the Video
- On the main menu go to Forwards

- In the Forward Accounts window you can
- Modify Forward
- Delete Forward
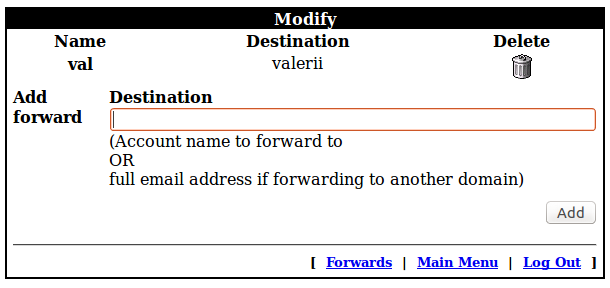
Modify Forward
- In the Modify Forward window you can
- Change Destination
- Delete Forward
Manage Mailing Lists
- Watch the Video
- On the main menu go to Mailing Lists

- In the Mailing Lists window you can
- Delete Mailing List
- Modify Mailing Lists
- Add Subdcriber
- Delete Subscriber
- Show Subscribers
- Add Moderator
- Delete Moderator
- Show Moderators
- Add Digest Subscriber
- Delete Digest Subscriber
- Show Digest Subscribers
