From help.computerisms.ca
Jump to navigation
Jump to search
Line 102:
Line 102: *Ensure "Activate CardDAV-Addressbook" is selected
*Ensure "Activate CardDAV-Addressbook" is selected
*Enter your email address as your Username
*Enter your email address as your Username
**If you
**If you are connecting to someone else's address book, you should still use your own email address and email password
**If your Username and Password are rejected, ensure [[Shared Address Book#I Need My Assistant To Edit My Address Book|you have been granted permission to use that calendar]]
*Enter your email password as Password
*Enter your email password as Password
*The value you need to enter for URL consists of two parts
*The value you need to enter for URL consists of two parts
Revision as of 00:21, 2 August 2012
Email To check your email using Roundcube, all you need to do is login
There is no need to configure anything in order to send or receive mail using RoundCube
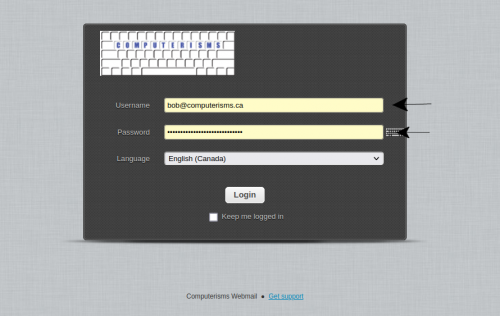
Open your browser and navigate to https://rc.domain.tld
Enter your email address in the Username field
Enter your email password in the Password field
If you prefer a language other than English, select it from the list
Click the login Button
Calendar Before you begin:
Open your browser and navigate to https://rc.domain.tld
Enter your email address in the Username field
Enter your email password in the Password field
If you prefer a language other than English, select it from the list
Click the login Button
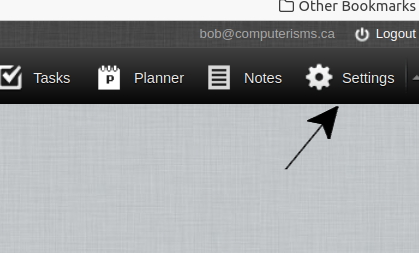
In the next window, find in the top right corner the link called "Settings"
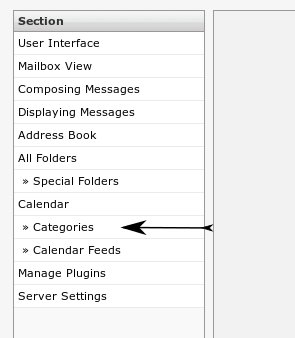
In the next window on the far left side, under the main category "Calendar", click the sub-category "Categories"
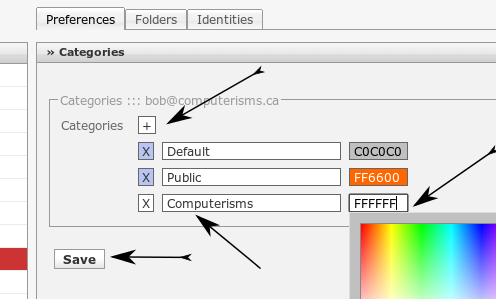
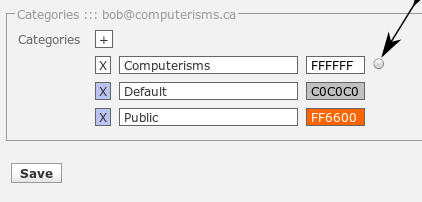
In the main pane of the window, click the plus sign. This will create a new line at the bottom of the list
Click in the longest field of the new line and enter a name for your calendar
The name is arbitrary, so it can be anything you like, though normally you would choose a name that has meaning for you.
If you wish to change the colour of your calendar, click in the box containing FFFFFF, then click on the colour you would like for your calendar
Click the Save Button
After you click save, the list will reorder alphabetically
Click the little round button next to the calendar you just created
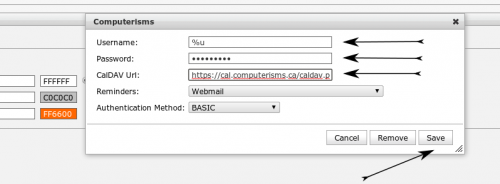
In the Username field you will find the value "%u"
%u is a short cut for the username you used to log into Roundcube, which will be the same as your email address
Enter your Email Password
The value you need to enter for "CalDAV Url" consists of two parts
Unless you know why you should do otherwise, leave "Reminders" and "Authentication Method" settings at their default
Click the Save Button
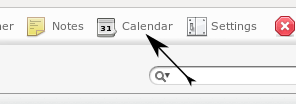
To start using your calendar, click the Calendar link in the top right corner of the window
Shared Address Book Before you begin:
Open your browser and navigate to https://rc.domain.tld
Enter your email address in the Username field
Enter your email password in the Password field
If you prefer a language other than English, select it from the list
Click the login Button
In the next window, find in the top right corner the link called "Settings"
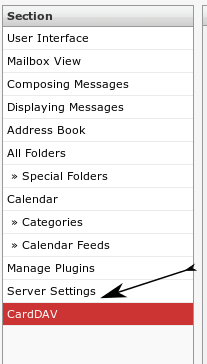
In the next window on the far left side, click the category called "CardDAV"
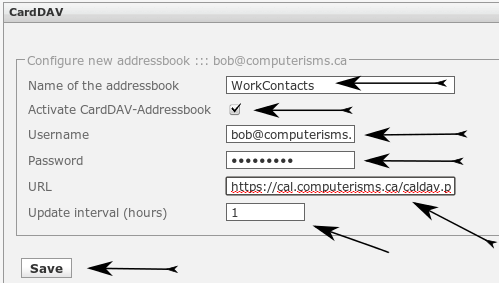
In the main pane of the window, enter a name for your address book
The name is arbitrary, so it can be anything you like, usually something meaningful to you.
The address book name must not contain a space
Ensure "Activate CardDAV-Addressbook" is selected
Enter your email address as your Username
Enter your email password as Password
The value you need to enter for URL consists of two parts
The update interval can be increased if you like
1 is the minimum acceptable value for this field
When everything is how you want it, click save
After you click save, you will be given the opportunity to add another address book if you want to.
In order to use your new address book, click on the Address Book link in the top right of the window
Ensure your CardDAV address book is selected, and you will be able to view and add contact entries to your Shared Address Book
To start using your calendar, click the Calendar link in the top right corner of the window
