How to import Certificate Authority on MAC: Difference between revisions
Jump to navigation
Jump to search
No edit summary |
|||
| (6 intermediate revisions by 2 users not shown) | |||
| Line 7: | Line 7: | ||
http://help.computerisms.ca | http://help.computerisms.ca | ||
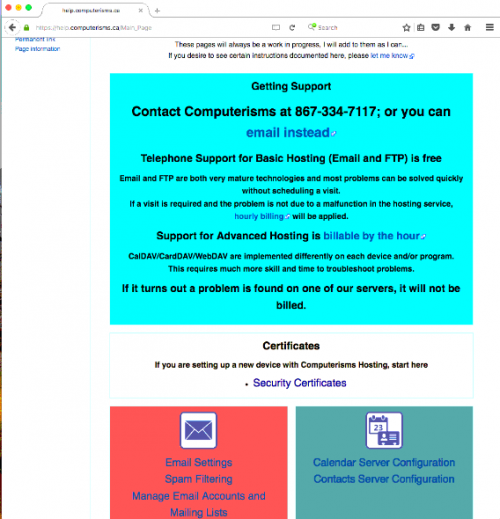
|[[ | *Scroll down and Click on "Security Certificates" | ||
|[[File:1website.png|center|500px]] | |||
|- | |- | ||
| | | | ||
|- | |- | ||
| | | | ||
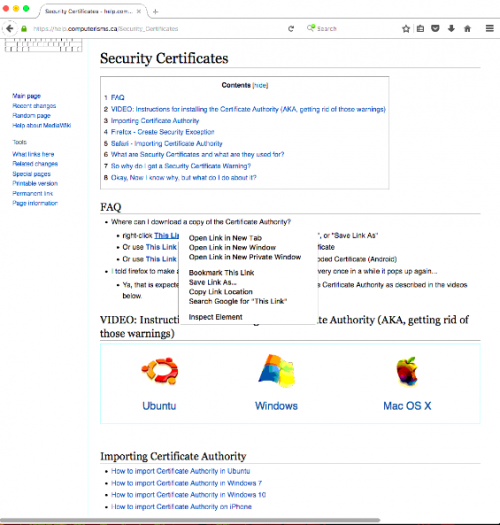
*Under the FAQ section right click on the first link and click on "Save Link As" | *Under the FAQ section right click on the first link and click on "Save Link As" | ||
|- | |- | ||
|[[File: | |[[File:2websiteDownload.png|center|500px]] | ||
| | | | ||
| Line 26: | Line 23: | ||
|} | |} | ||
==How to install Computerisms Certificate Authority into your | *MAC (quick notes) | ||
SAFARI: Install certificate: help.computerisms.ca (downloads) | |||
Select: FINDER Select: Applications Select: Utilities | |||
Select: Keychain Access Select: Certificate Authority CHANGE SETTING: (always trust) | |||
STAMP ICON: email client | Select: System Preferences Select:Internet Accounts | |||
==How to install Computerisms Certificate Authority into your MAC== | |||
{| style="width:100%" border="0" cellspacing="0" cellpadding="20" style="font-size:120%; | {| style="width:100%" border="0" cellspacing="0" cellpadding="20" style="font-size:120%; | ||
|- | |- | ||
| Line 35: | Line 42: | ||
* | *locate the certificate that you downloaded earlier | ||
*change the file extension from <b>".pem" to ".cer"</b> | |||
[[File:3changeName.png]] | |||
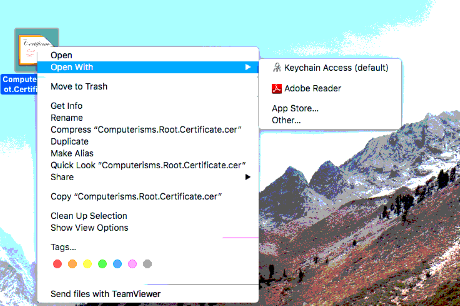
* | *Right click on the edited certificate and go: Open With>>Keychain Access(default) | ||
[[File:4AddKeychain.png|center|500px]] | |||
|- | |- | ||
| | | | ||
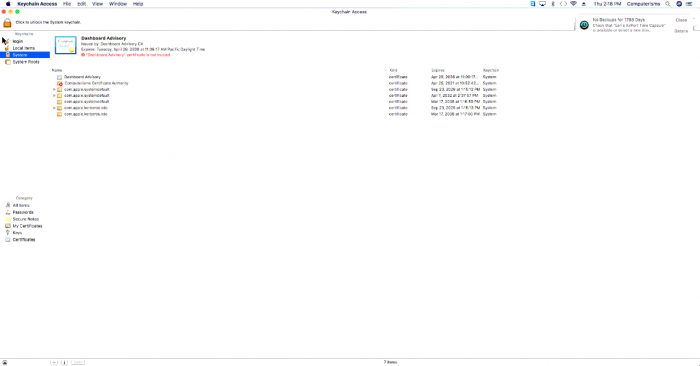
* | *Go to the system tab and find the Certificate | ||
[[File:5KeychainCert.png|center|700px]] | |||
| | |||
|} | |||
{| style="width:100%" border="0" cellspacing="0" cellpadding="20" style="font-size:120%; | |||
|- | |- | ||
| | |style="width: 50%"| | ||
[[File:6GetInfo.png|right]] | |||
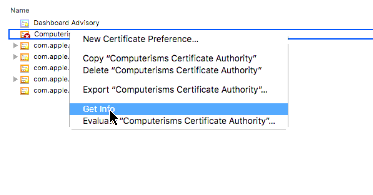
|*Right click on the certificate and click on <b>"Get Info"</b> | |||
|- | |- | ||
| | |*afterwards another window pops up that describes the certificate information | ||
| | | | ||
|- | |- | ||
|[[File:7Permissions.png]] | |||
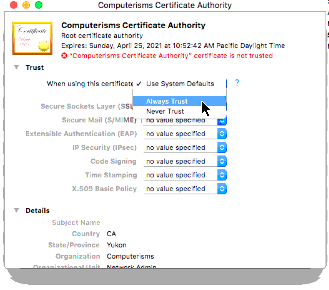
|*Under the certificate image in the top left is a little triangle and the word <b>"Trust"</b> | |||
|- | |- | ||
| | |*click on the triangle to show the permissions for the certificate and select <b>Always Trust</b> | ||
* | |||
|- | |- | ||
| | |*And your done! | ||
* | |||
|- | |- | ||
|} | |} | ||
Latest revision as of 20:16, 26 September 2019
How to download Computerisms Certificate Authority
http://help.computerisms.ca
|
 |
| |
 |
|
- MAC (quick notes)
SAFARI: Install certificate: help.computerisms.ca (downloads)
Select: FINDER Select: Applications Select: Utilities
Select: Keychain Access Select: Certificate Authority CHANGE SETTING: (always trust)
STAMP ICON: email client | Select: System Preferences Select:Internet Accounts
How to install Computerisms Certificate Authority into your MAC
 | |
 |

