Outlook: Difference between revisions
Jump to navigation
Jump to search
No edit summary |
|||
| (7 intermediate revisions by the same user not shown) | |||
| Line 2: | Line 2: | ||
{| style="width: 100%; border-spacing:15px;border-collapse:separate;border: 1px solid rgb(191, 238, 255); background-color: rgb(255, 235, 205);text-align:center;font-size:1.5em;" | {| style="width: 100%; border-spacing:15px;border-collapse:separate;border: 1px solid rgb(191, 238, 255); background-color: rgb(255, 235, 205);text-align:center;font-size:1.5em;" | ||
|- valign="center" | |- valign="center" | ||
| [[file:outlook.png|link= | | [[file:outlook.png|link=https://help.computerisms.ca/images/b/bb/ConfigOutlookEmail.mp4|75px]] | ||
|| | || | ||
|- | |- | ||
| [[Media: | | [[Media:ConfigOutlookEmail.mp4|Email]] | ||
|| | || | ||
|} | |} | ||
== | ==Email Setup (Fresh Install)== | ||
{| style="width:100%" border="0" cellspacing="0" cellpadding="20" style="font-size:120%; | {| style="width:100%" border="0" cellspacing="0" cellpadding="20" style="font-size:120%; | ||
|- | |- | ||
|style="width: 50%"| | |style="width: 50%"| | ||
*<b> | *<b>This guide assumes you already have Office installed</b> | ||
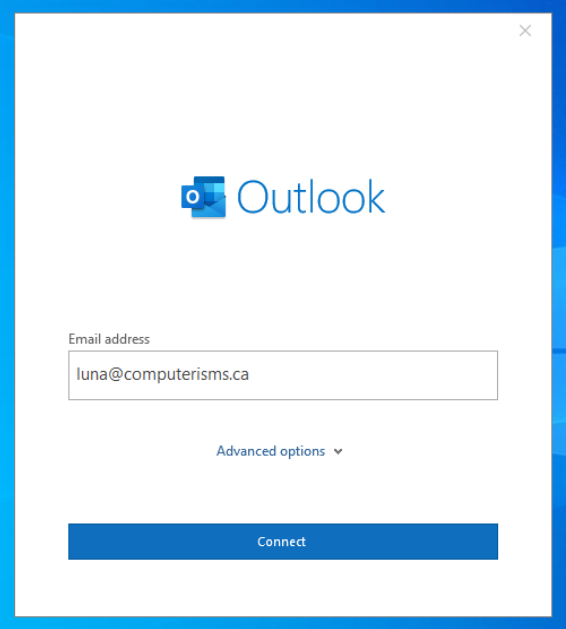
* | *Open Outlook. Since this is a new install, you'll get a nice splash screen. Type in your email address (youraddress@yourdomain.tld) and hit <code>Connect</code> | ||
|[[File:Outlook1.png|center|600px]] | |||
|[[File: | |||
|- | |- | ||
|[[File: | |[[File:Outlook2.png|center|700px]] | ||
| | | | ||
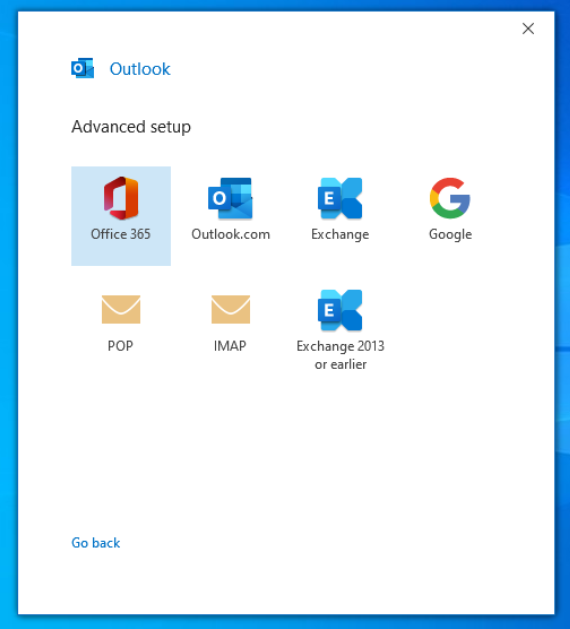
* | *You'll likely land on a screen that looks like the following. You want to select IMAP | ||
|- | |- | ||
| | | | ||
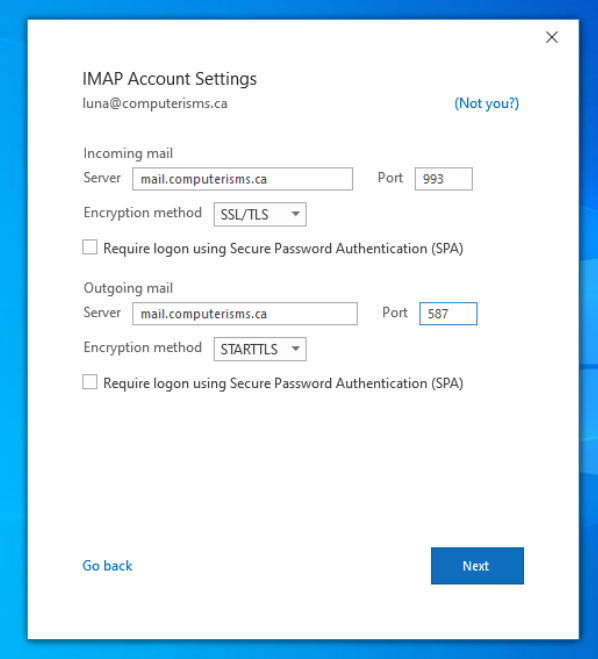
</b>Set settings as follows:</b> | |||
</b> | *Incoming Mail | ||
* | **Server: <code>mail.yourdomain.tld</code> | ||
* | **Port: <code>993</code> | ||
</ | **Encryption Method: <code>SSL/TLS</code> | ||
* | *Outgoing Mail | ||
* | **Server: <code>mail.yourdomain.tld</code> | ||
* | **Port: <code>465</code> | ||
|[[File: | **Encryption Method: <code>SSL/TLS</code> | ||
*If all of that looks good, hit Next | |||
|[[File:Outlook3.png|center|700px]] | |||
|- | |- | ||
|[[File: | |[[File:Outlook4.png|center|500px]] | ||
| | | | ||
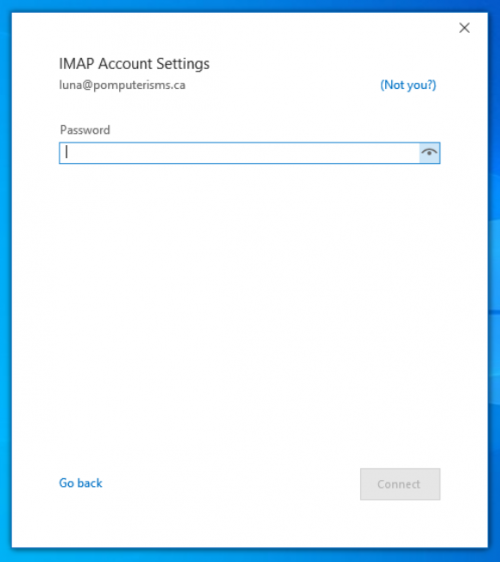
*It should prompt you for your password now. Type that in and hit Connect | |||
* | |||
|- | |- | ||
| | | | ||
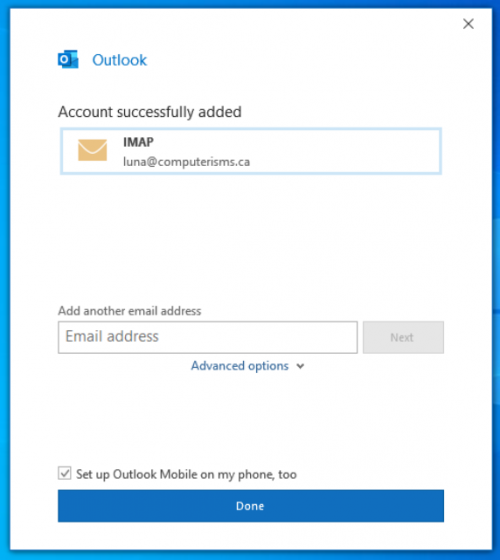
* | *If it all went well, you should see a screen like this. Congratulations, you're done! | ||
|[[File:Outlook5.png|center|500px]] | |||
|[[File: | |||
|- | |- | ||
|[[File: | |} | ||
==Email Setup (Non Fresh Install)== | |||
{| style="width:100%" border="0" cellspacing="0" cellpadding="20" style="font-size:120%; | |||
|- | |||
|style="width: 50%"| | |||
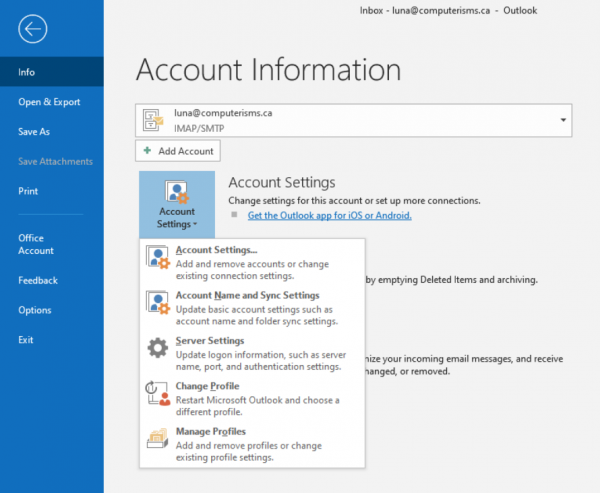
*Open Outlook, and head to "File" in the upper-left corner of the window, then "Info", "Account Settings" and "Account Settings..." | |||
|[[File:Outlooknonfresh1.png|center|600px]] | |||
|- | |||
|[[File:Outlooknonfresh2.png|center|700px]] | |||
| | | | ||
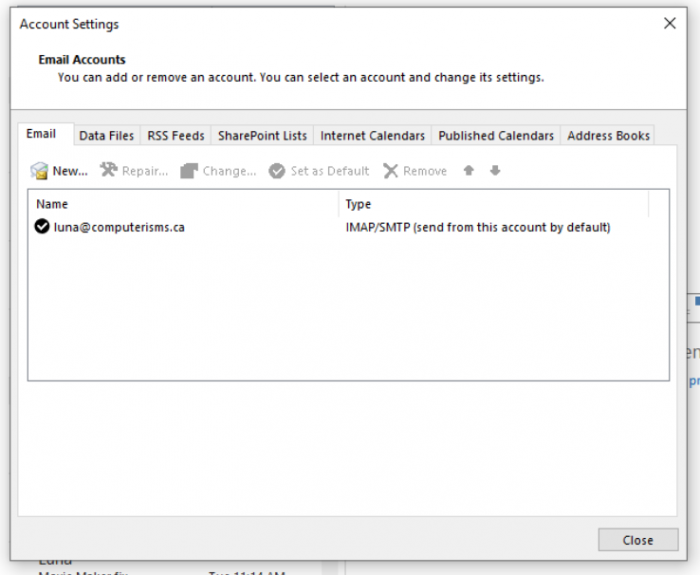
* | *In this window, select "New..."; From here, the setup is the same as the guide for fresh installs listed above | ||
|- | |||
|} | |} | ||
| Line 64: | Line 64: | ||
***Tested in Outlook 2016: Seemed easy enough to set up and sync the CalDAV calendar, is relatively slow on first sync. Only supports up to Outlook 2016 at the most. | ***Tested in Outlook 2016: Seemed easy enough to set up and sync the CalDAV calendar, is relatively slow on first sync. Only supports up to Outlook 2016 at the most. | ||
**https://caldavsynchronizer.org/ | **https://caldavsynchronizer.org/ | ||
***Tested in Outlook | ***Tested in Outlook 2019, very easy to set up and configure. Says it supports office 365 but currently we have no way of testing that. | ||
Latest revision as of 17:52, 27 August 2021
Video Tutorial

|
|
Email Setup (Fresh Install)
Email Setup (Non Fresh Install)
Calendar and Address Book
- In order to make the calendar and address book work for outlook, you will need a third party plugin. Here is a list of compatible ones, though each has it's limitations, and none has been tested in production by us:
- http://ical.gutentag.ch
- Tested in Outlook 2010: this program works well, but was confusing to setup and not entirely intuitive to use; Is also paid only! There is a trial.
- http://www.cfos.de/en/index.htm
- Tested in Outlook 2016: Seemed easy enough to set up and sync the CalDAV calendar, is relatively slow on first sync. Only supports up to Outlook 2016 at the most.
- https://caldavsynchronizer.org/
- Tested in Outlook 2019, very easy to set up and configure. Says it supports office 365 but currently we have no way of testing that.
- http://ical.gutentag.ch
