Email Port Change: Difference between revisions
Jump to navigation
Jump to search
(Created page with " {| style="width:100%" border="0" cellspacing="0" cellpadding="20" style="font-size:120%; |- |style="width: 50%"| *Open up thunderbird and head to the right hand menu area wh...") |
No edit summary |
||
| (6 intermediate revisions by the same user not shown) | |||
| Line 1: | Line 1: | ||
If the email client you use is not listed here or you need assistance, do not hesitate to call us at 867-334-7117. | |||
==Thunderbird== | |||
{| style="width:100%" border="0" cellspacing="0" cellpadding="20" style="font-size:120%; | {| style="width:100%" border="0" cellspacing="0" cellpadding="20" style="font-size:120%; | ||
|- | |- | ||
| Line 6: | Line 7: | ||
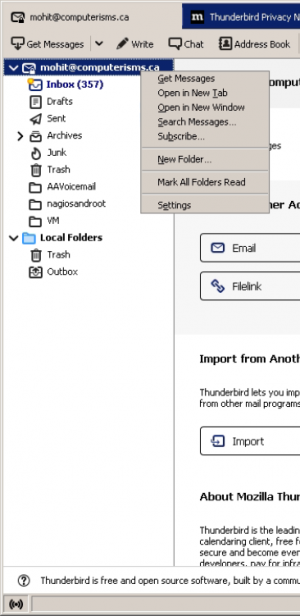
*Open up thunderbird and head to the right hand menu area which contains your email addresses, and right click on top of your Computerisms hosted Email Account | *Open up thunderbird and head to the right hand menu area which contains your email addresses, and right click on top of your Computerisms hosted Email Account | ||
*In the context menu that appears, select <code>Settings</code> | *In the context menu that appears, select <code>Settings</code> | ||
|[[File: | |[[File:TBPort1.png|centre|300px]] | ||
|- | |- | ||
|[[File: | |[[File:TBPort2.png|centre|700px]] | ||
| | | | ||
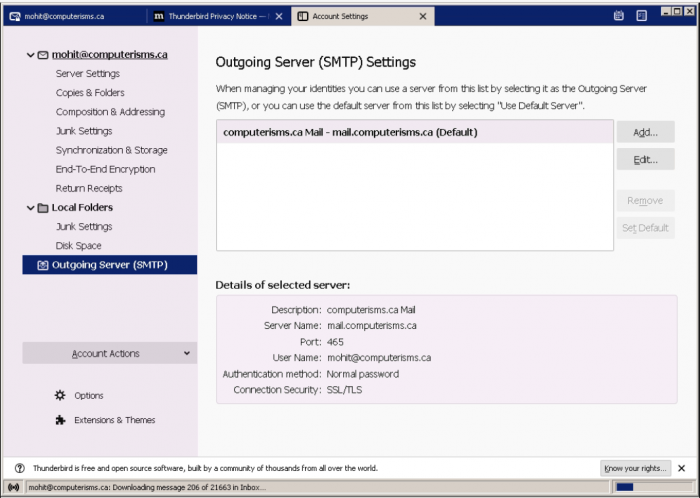
*Head down to the bottom of the side menu, to the option labeled <code>Outgoing Server (SMTP)</code> | *Head down to the bottom of the side menu, to the option labeled <code>Outgoing Server (SMTP)</code> | ||
| Line 18: | Line 19: | ||
|- | |- | ||
| | | | ||
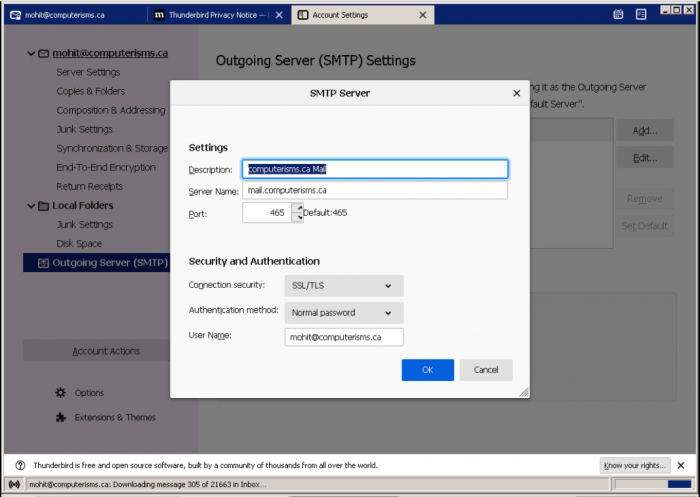
*Change the Port under the Settings header to <code>465</code> and the Connection Security down under Security and Authentication to <code>SSL/TLS</code> | *Change the Port under the Settings header to <code>465</code> and the Connection Security down under Security and Authentication to <code>SSL/TLS</code> and click on OK. | ||
|[[File: | *You're done! Feel free to close the account settings tab that had been opened in the main Thunderbird window | ||
|[[File:TBPort3.png|centre|700px]] | |||
|- | |||
|} | |||
==Outlook== | |||
{| style="width:100%" border="0" cellspacing="0" cellpadding="20" style="font-size:120%; | |||
|- | |||
|style="width: 50%"| | |||
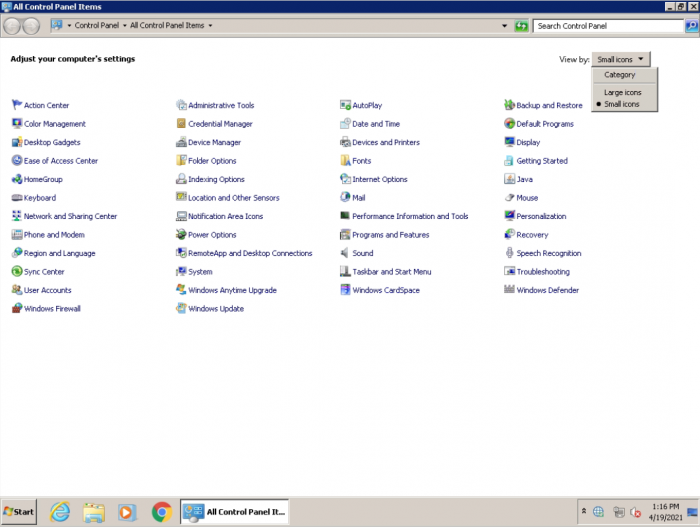
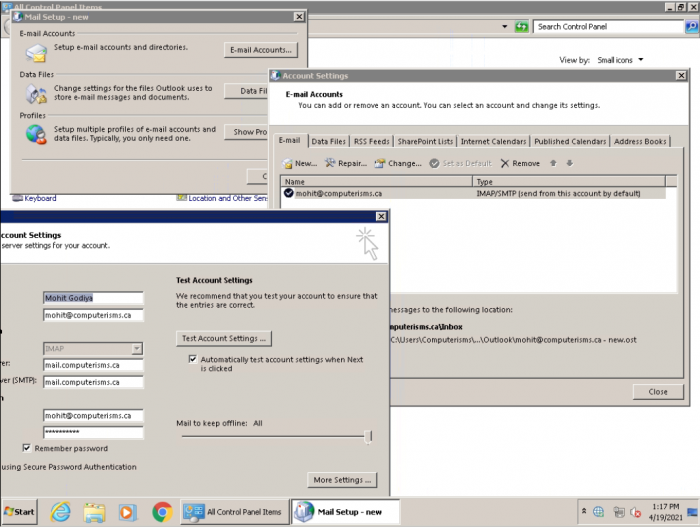
*Go to the Windows Start Menu and search for <code>Control Panel</code>. Go ahead and open it | |||
*In the Control Panel, head to the search bar, above, and search for Mail. You should see it come up in the search results. Click on it | |||
|[[File:OutlookC1.png|centre|700px]] | |||
|- | |||
|[[File:OutlookC2.png|centre|700px]] | |||
| | |||
*Once that opens up, you should see three options. You want to select <code>E-mail Accounts...</code> | |||
*In the windows that opens up there, select your Computerisms hosted email account and select <code>Change...</code> in the area above | |||
*In this window, select <code>More Settings...</code> | |||
|- | |||
| | |||
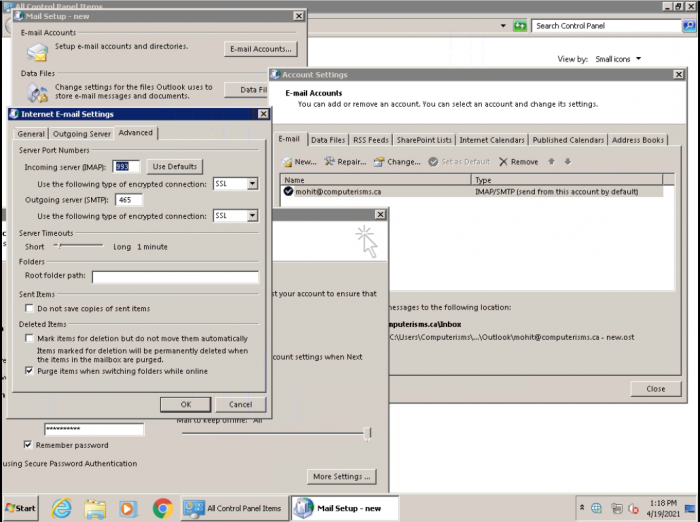
*Switch to the <code>Advanced</code> tab | |||
*Change the Port in the Outgoing server (SMTP) to <code>465</code> and <code>SSL</code> underneath that | |||
*You're done! Outlook will likely run a quick check of the new settings when you go to exit from the various windows and you should be good to go! | |||
|[[File:OutlookC3.png|centre|700px]] | |||
|- | |- | ||
|} | |||
==BlueMail (Android)== | |||
{| style="width:100%" border="0" cellspacing="0" cellpadding="20" style="font-size:120%; | |||
|- | |||
|style="width: 50%"| | |||
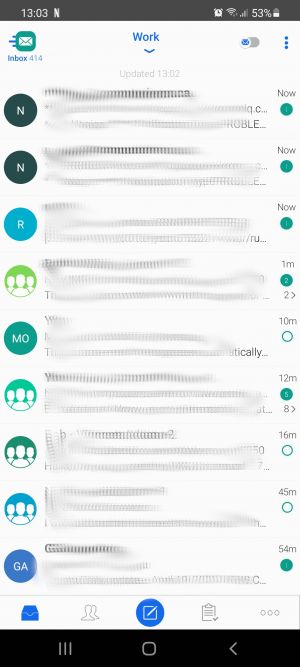
*In BlueMail, in your inbox hit the <code>Inbox</code> icon in the upper left side of your screen | |||
|[[File:Bluemail1.jpeg|center|300px]] | |||
|- | |||
|[[File:Bluemail2.jpeg|center|300px]] | |||
| | |||
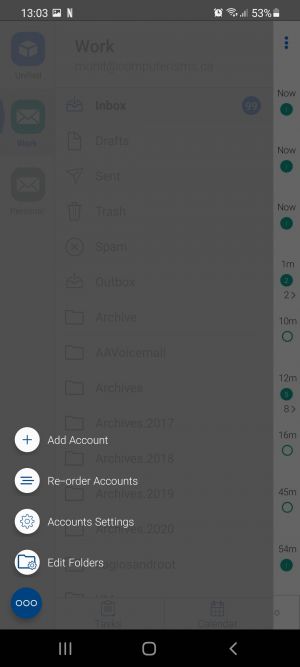
*On this page, select <code>Accounts Settings</code> | |||
|- | |||
| | |||
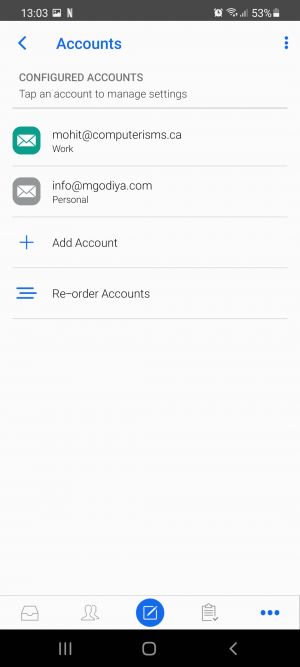
*Select the email account that is on Computerisms hosting | |||
|[[File:Bluemail3.jpeg|center|300px]] | |||
|- | |||
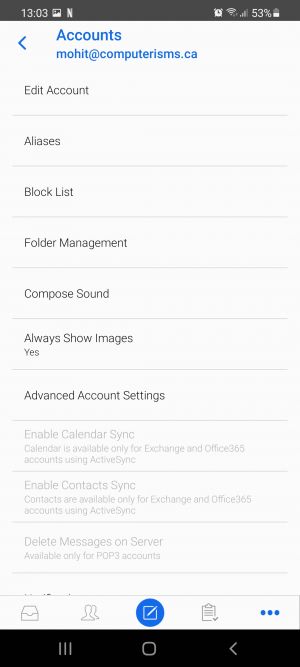
|[[File:Bluemail4.jpeg|center|300px]] | |||
| | |||
*Select <code>Advanced Account Settings</code> | |||
|- | |||
| | |||
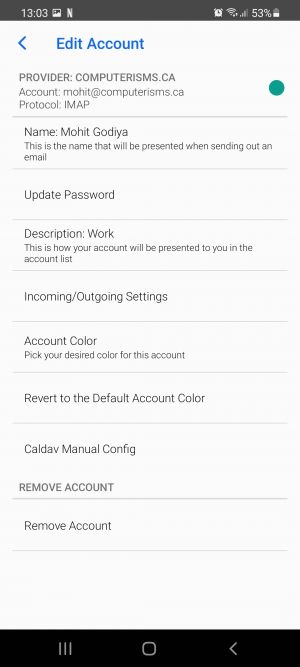
*Select <code>Incoming/Outgoing Settings</code> | |||
|[[File:Bluemail5.jpeg|center|300px]] | |||
|- | |||
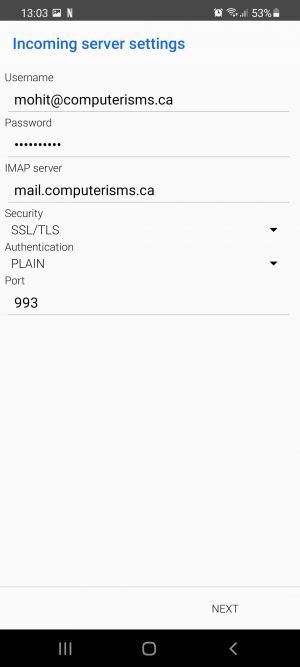
|[[File:Bluemail6.jpeg|center|300px]] | |||
| | |||
*Leave the Incoming server settings alone, just hit <code>Next</code> on the lower-right of your screen | |||
|- | |||
| | |||
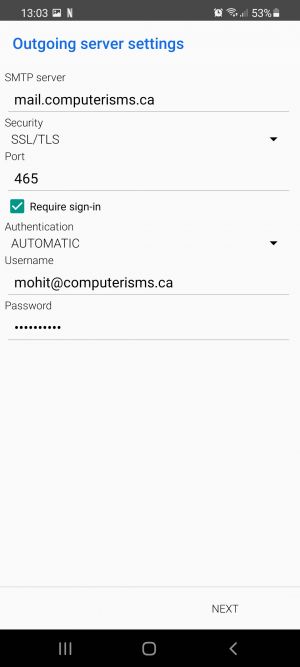
*Change the Security drop-down to <code>SSL/TLS</code> and the port number to <code>465</code>. Everything else should be able to be left as it is. | |||
*Hit next and if everything is good you'll be dropped back into the previous settings window. Congrats, you're done! | |||
|[[File:Bluemail7.jpeg|center|300px]] | |||
|- | |||
|} | |||
==iOS Devices== | |||
{| style="width:100%" border="0" cellspacing="0" cellpadding="20" style="font-size:120%; | |||
|- | |||
|style="width: 50%"| | |||
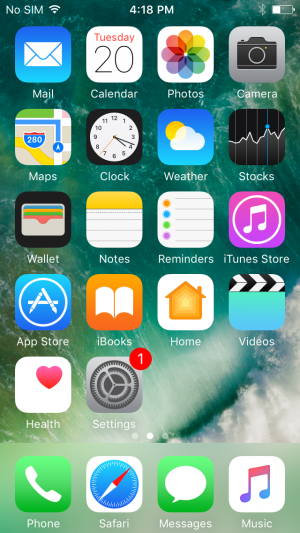
*On your Home page, go to the Settings app | |||
|[[File:IOSPort1.PNG|center|300px]] | |||
|- | |||
|[[File:IOSPort2.PNG|center|300px]] | |||
| | |||
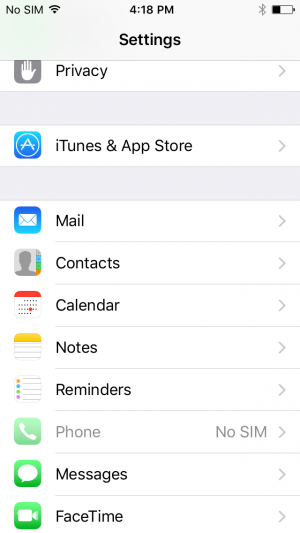
*Scroll down the main Settings page until you get to <code>Mail</code>. Select it | |||
|- | |||
| | |||
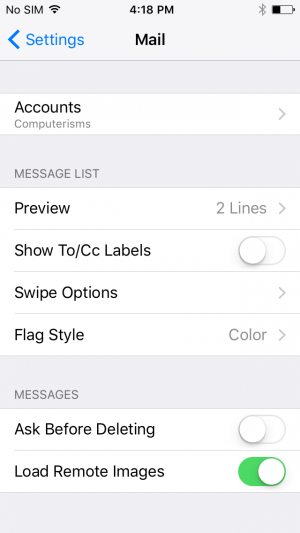
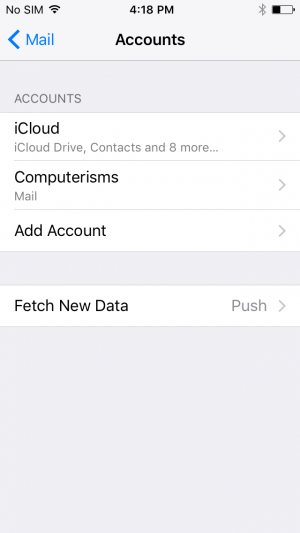
*Select <code>Accounts</code> | |||
|[[File:IOSPort3.PNG|center|300px]] | |||
|- | |||
|[[File:IOSPort4.PNG|center|300px]] | |||
| | |||
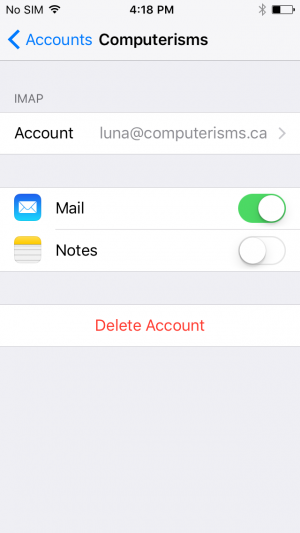
*Select the Computerisms hosted E-mail account from the list | |||
|- | |||
| | |||
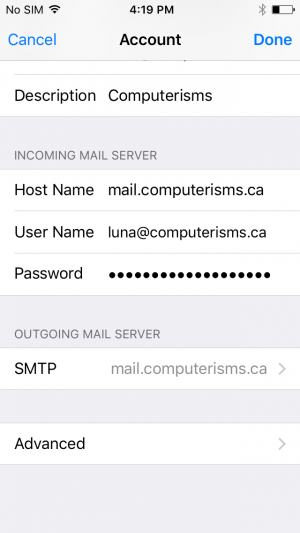
*Select <code>Account</code> | |||
|[[File:IOSPort5.PNG|center|300px]] | |||
|- | |||
|[[File:IOSPort6.PNG|center|300px]] | |||
| | |||
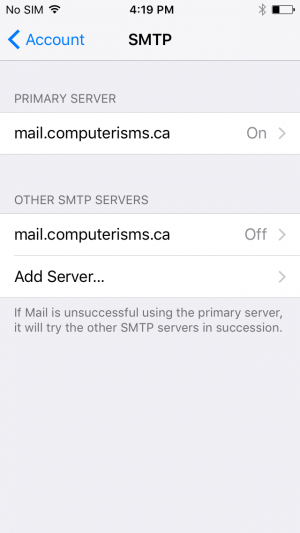
*Leave the Incoming Server settings alone, select the <code>SMTP</code> option | |||
|- | |||
| | |||
*Select the option under Primary Server, it should say something like <code>mail.yourdomain.tld</code> and be <code>On</code> | |||
|[[File:IOSPort7.PNG|center|300px]] | |||
|- | |||
|[[File:IOSPort8.PNG|center|300px]] | |||
| | |||
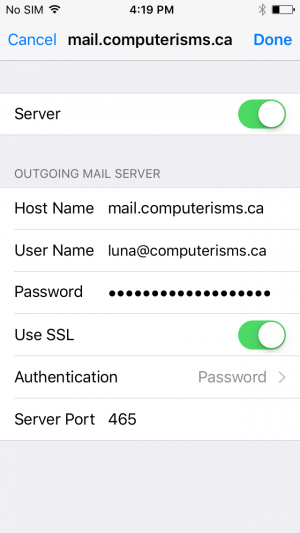
*On this page, make sure <code>Use SSL</code> is turned on, and change the Server Port to <code>465</code> | |||
**Everything else should be left as-is | |||
*Go ahead and click done. If the account verifies successfully, congratulations, you're done! | |||
|} | |} | ||
Latest revision as of 00:03, 21 April 2021
If the email client you use is not listed here or you need assistance, do not hesitate to call us at 867-334-7117.
