Security Certificates: Difference between revisions
Jump to navigation
Jump to search
No edit summary |
No edit summary |
||
| Line 54: | Line 54: | ||
|- | |- | ||
| | | | ||
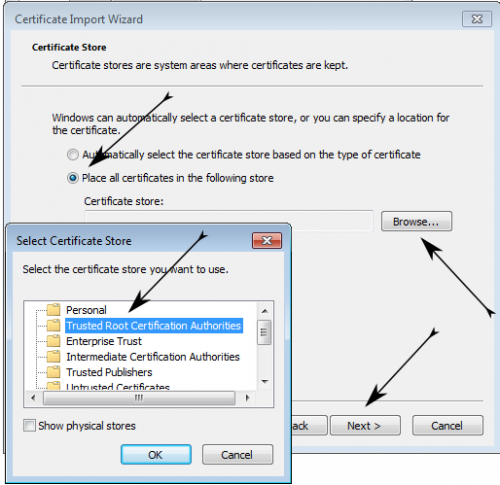
* | *Move the Radio button to be beside "Place all Certificates in the following store" | ||
*Click the browse button to open the navigation window | |||
*In the navigation window, select "Trusted Root Certification Authorities" | |||
*Click OK, then click Next | |||
|[[File:help.cert.import.2.png|center|500px]] | |||
|- | |||
|[[File:help.cert.import.3.png|center|500px]] | |||
| | |||
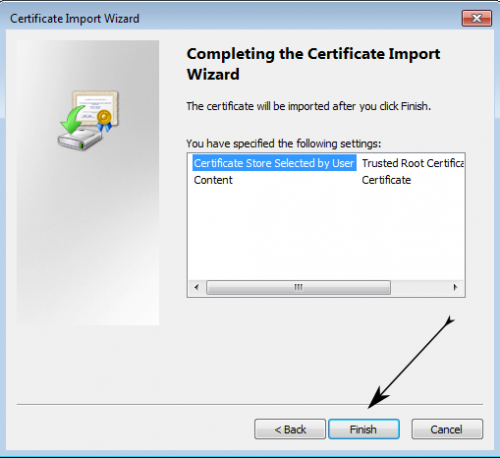
*Click the Finish button | |||
|- | |||
| | |||
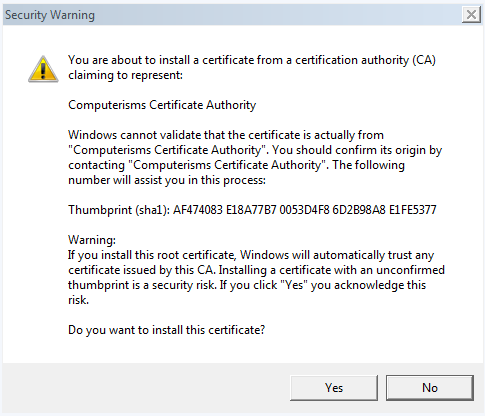
*Another warning window will pop up, click Yes in the bottom right corner | |||
|[[File:help.cert.import.warning.png|center|500px]] | |||
|- | |||
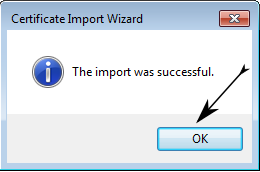
|[[File:help.cert.import.confirm.png|center|500px]] | |||
| | |||
*A window will pop up confirming the import was successful, click OK on that window | |||
*Click OK on the Certificate Window | |||
|} | |} | ||
Revision as of 14:27, 2 August 2012
- Security Certificates are a method of establishing trust between different entities on a network
- An entity can be a person or a machine
- Certificates can, in addition to creating trust relationships, also be used to encrypt communications
- This is especially important when transmitting a username and password across the internet
- Certificate warnings indicates that your computer does not know the origin of the certificate on the server
- Since your computer cannot verify the origin of the certificate on the server, it cannot establish a trust relationship with the server
- By temporarily overriding the warning, you instruct your computer to trust the certificate on the server
- Once the trust is established, then the certificates can be used to encrypt the communication so your password is not transmitted in clear text
- Certificates can be purchased for the server so the warning doesn't appear in your browser, but they are prohibitively expensive for our hosting environment
- Certificates in general are very very expensive in proportion to the effort required to make them.
- Computerisms can make certificates that will encrypt a connection every bit as good as a paid certificate for a small fraction of the cost
- Certificates generated by Computerisms will not be automatically trusted by your computer, and therefor will always show you the certificate warning
- In the case of Computerisms and its customers, we can manually establish our trust, which in turn allows encryption of our passwords
- Despite the warning, the encryption is still taking place on our system
- Said another way: Security certificates are still securing your transmission, even though the warning might make you think otherwise.
- Despite the warning, the encryption is still taking place on our system
- Computerisms Certificates can be installed on your machine in such a way that your computer will trust the Computerisms certficates
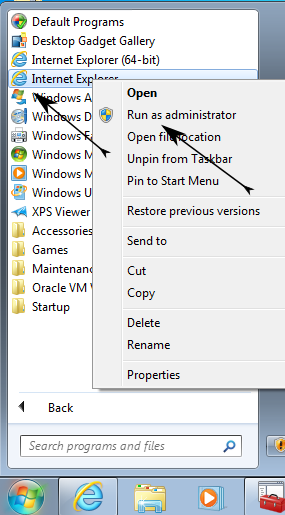
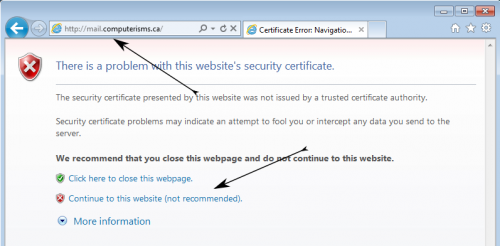
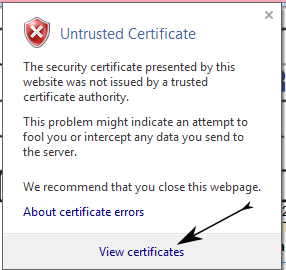
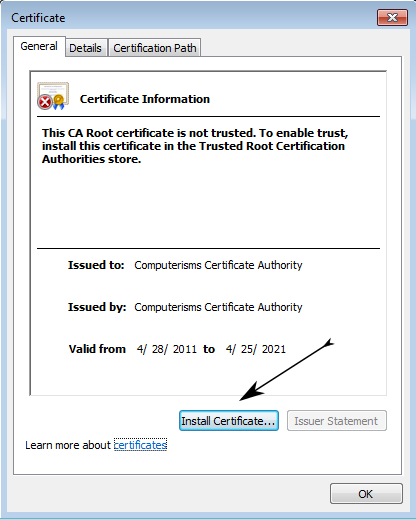
- If you do not want to see the warning at every page, then please follow these instructions
|
 |
 |
|
|
 |
 |
|
|
 |
 |
|
|
 |
 |
|
|
 |
 |
|